
Building a Giant Overhead Light Bank
When a client approached us about photographing a 16' x 16' x 16' set (a specialized home interior mock-up) inside a studio, we had some homework to do. The first question: how would we light such a large object (including people and equipment) evenly? We couldn't have those weird multi-directional shadows that happen when you have lots of small strobes positioned around a set.
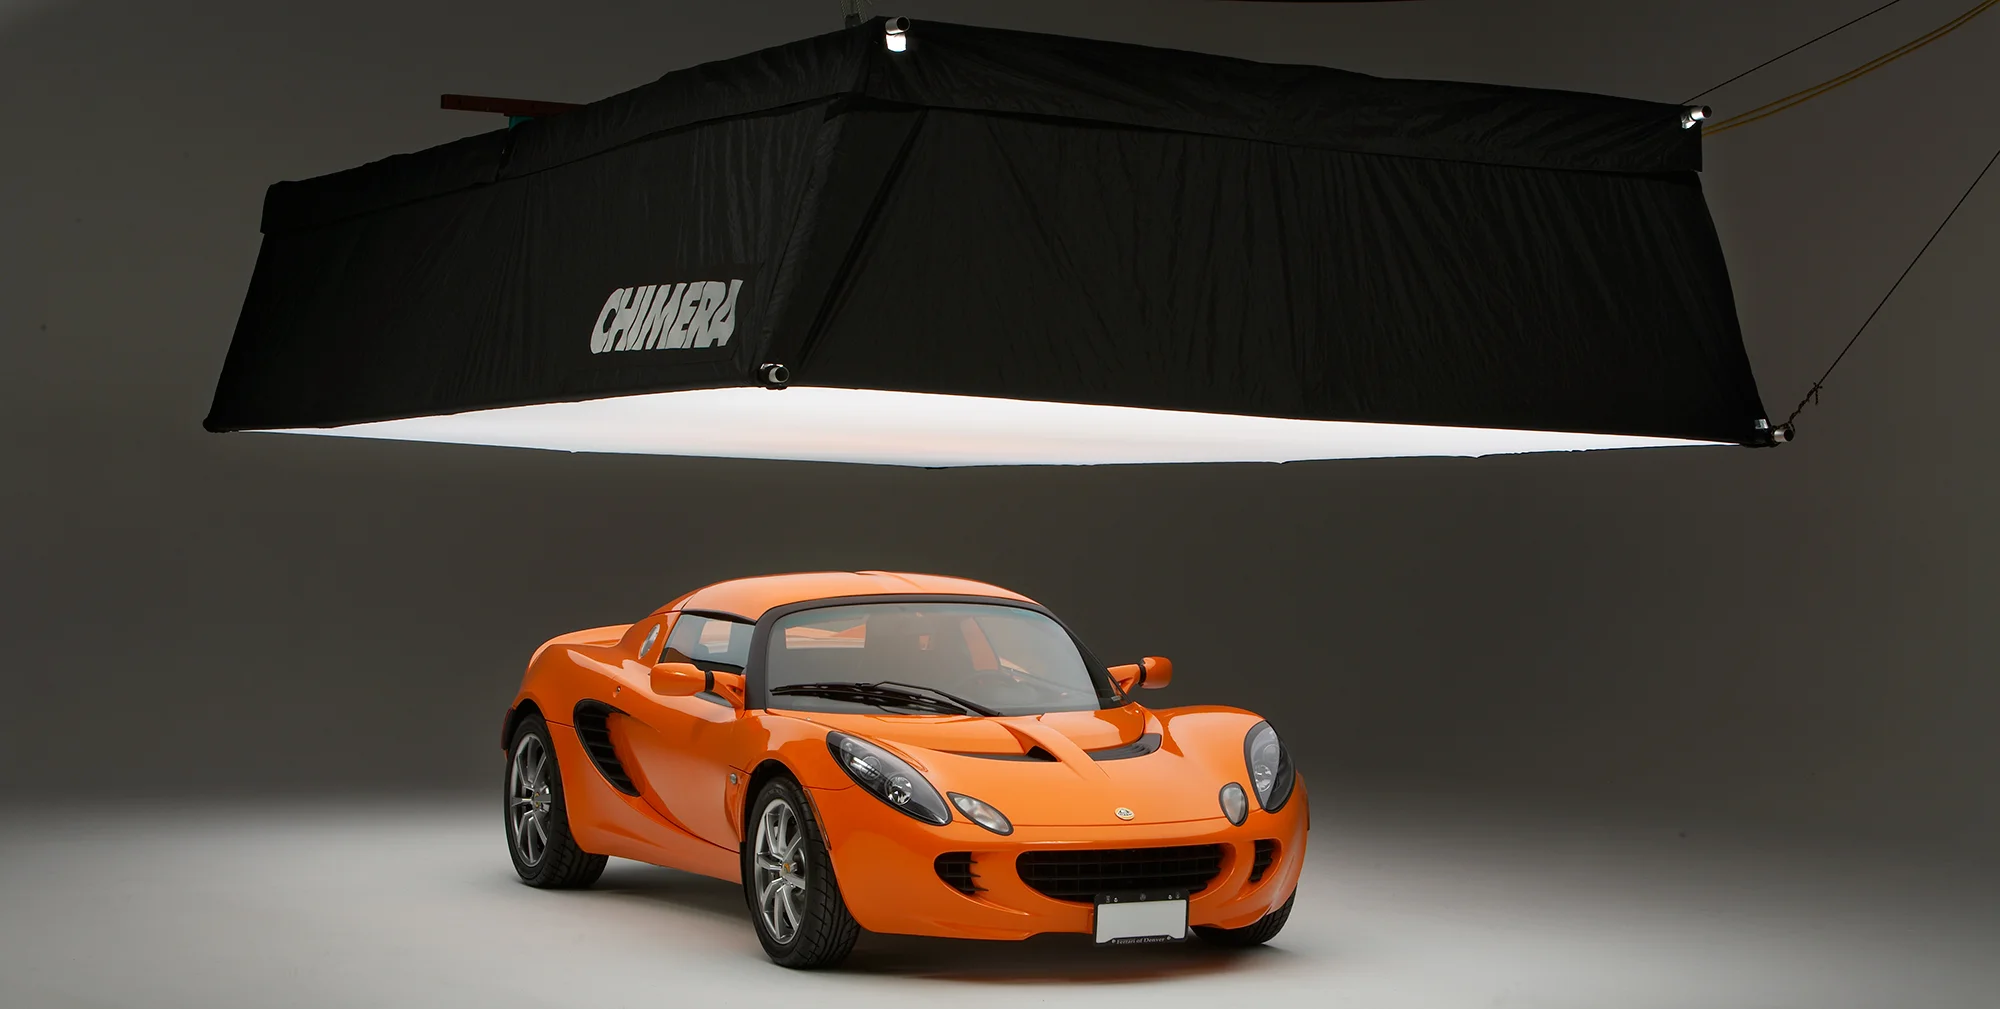
We decided that a gigantic overhead softbox would be just the ticket. You know, one of those huge light banks that commercial car photographers hang from the ceiling to get that smooth, even, gorgeous light on antique and supercars. Or tractors. Or whatever.

Research
So we did some investigating and discovered that the big, soft, gorgeous light comes at a hefty price. The client was willing to pay what it takes to do the job right, but $10k for a 10' x 20' light was pushing the limits of what they had budgeted for this project.
A little more surfing uncovered a post by photographer and nationally-known teacher Scott Kelby. In the excellent and detailed post, he describes a car shoot at Studio75, owned by Dan Gaye. Dan built his own overhead light bank:
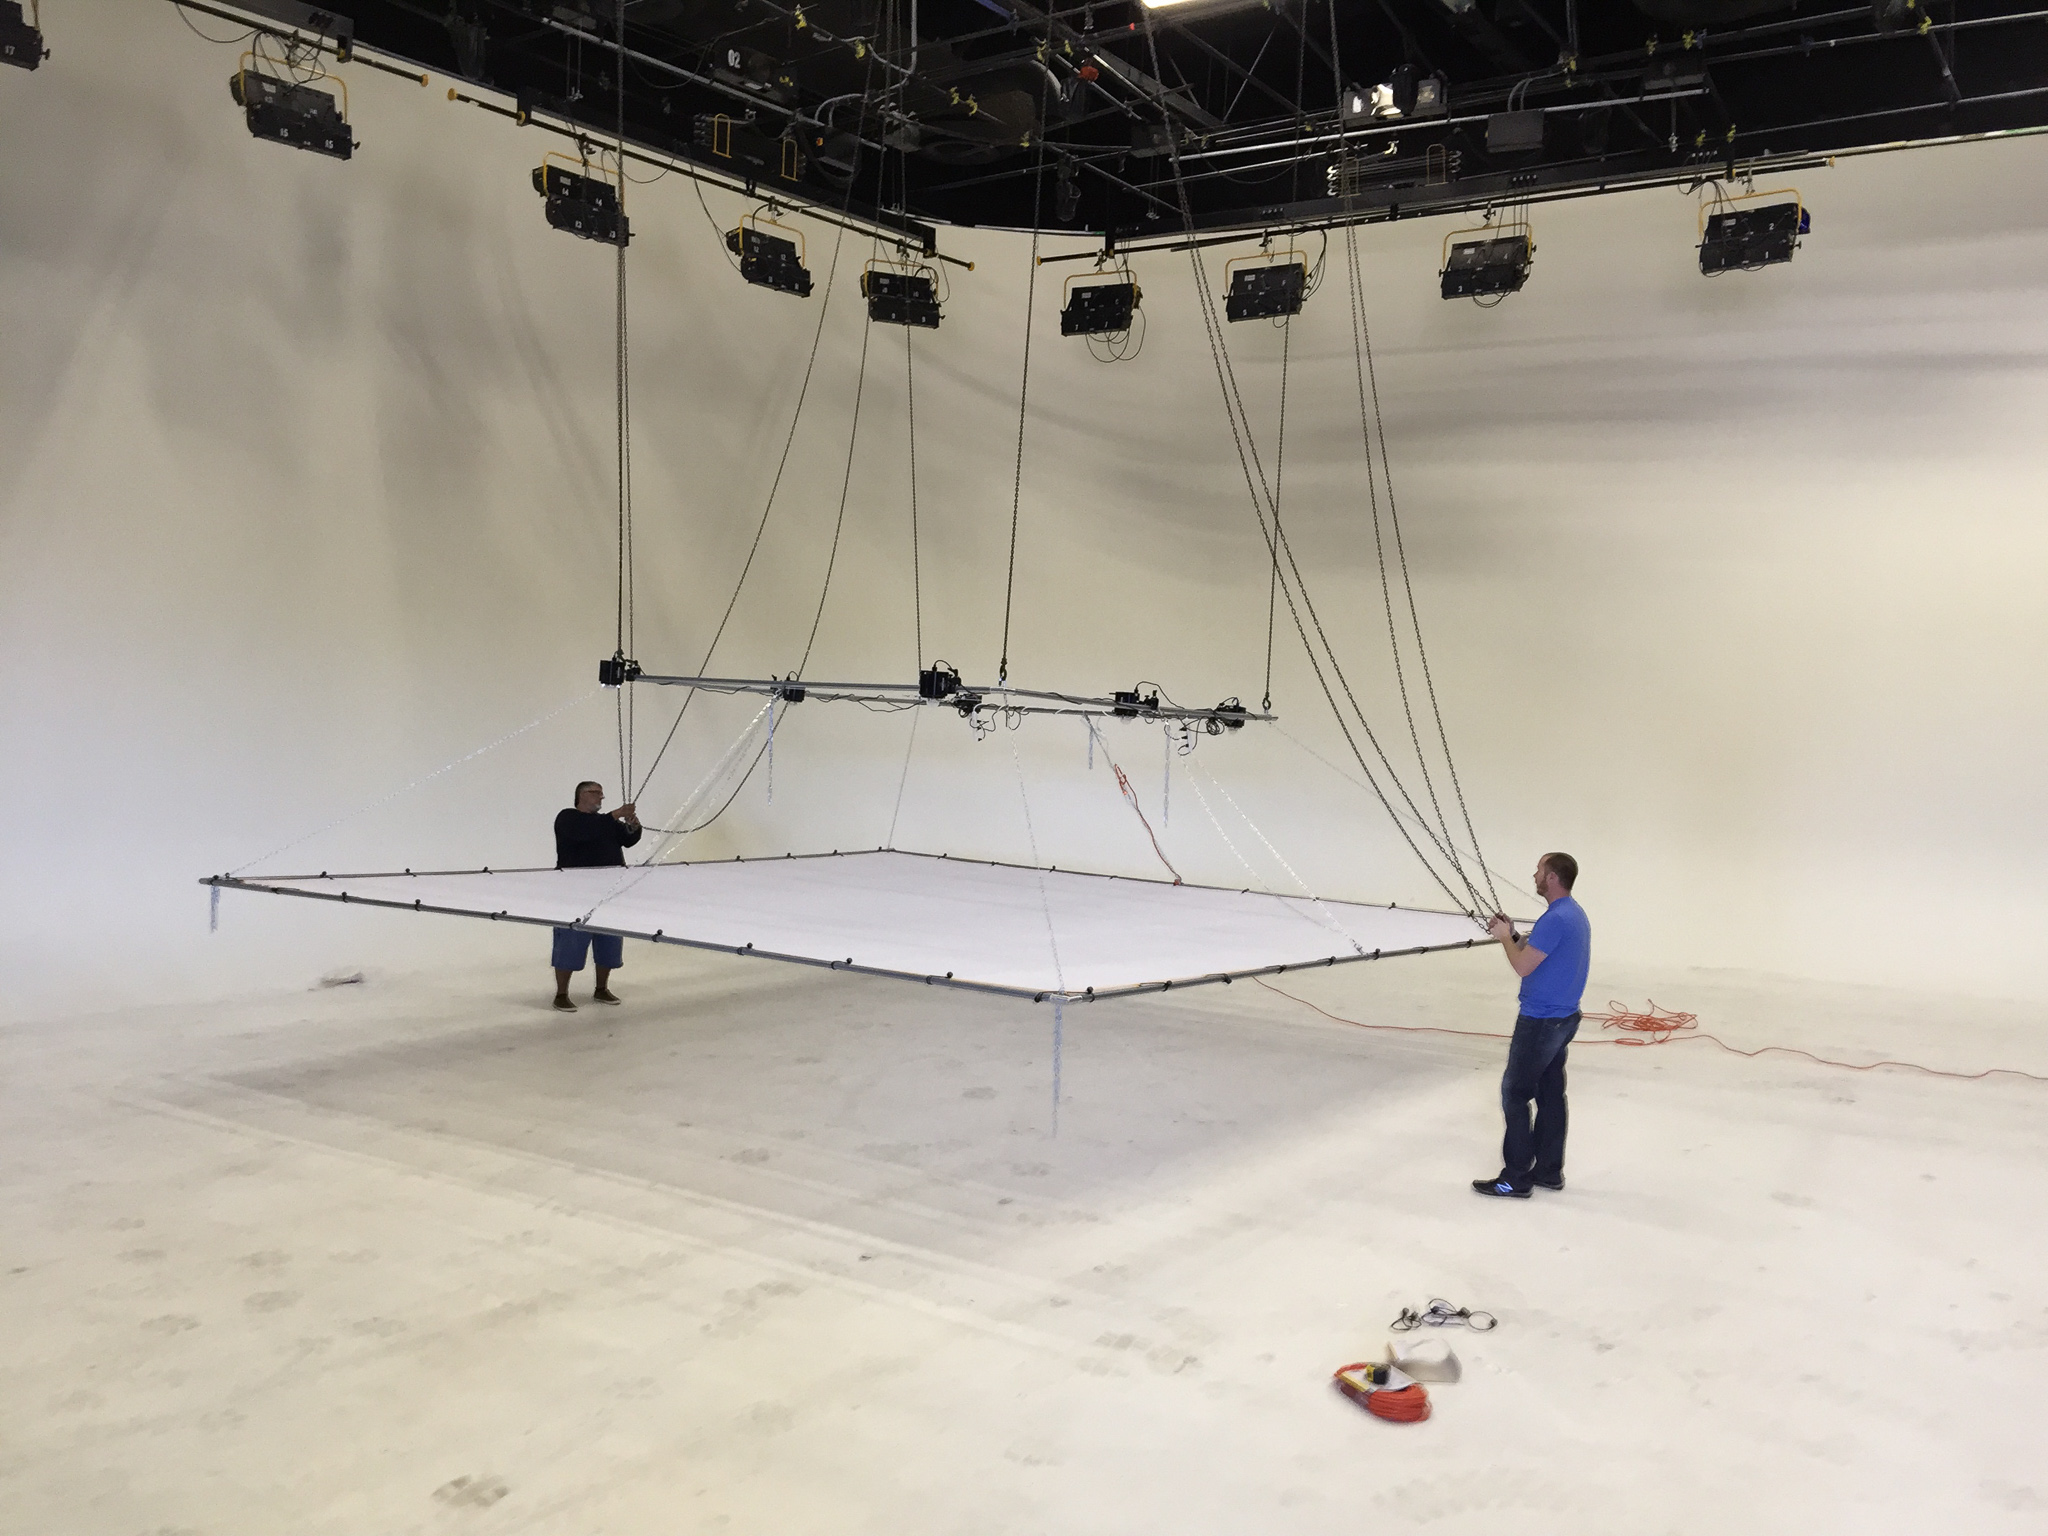
![Dan Gaye of Studio75 built this overhead light bank in his studio, as described in Scott Kelby's post [click photo for link].](https://images.squarespace-cdn.com/content/v1/53057e88e4b052d61bf173ef/1422286174616-6Z9UNL6ZQMB2CB5BXLY0/image-asset.jpeg)
Dan Gaye of Studio75 built this overhead light bank in his studio, as described in Scott Kelby's post [click photo for link].
We were encouraged by Dan's innovative DIY solution, and got some good ideas from studying it. However, he built his in separate segments, which are semi-permanently mounted to the walls and ceiling of his studio (pictured above).
We needed a self-contained unit that included everything in one piece, which could be hoisted by four chains to a height of 20' above the floor of the gigantic rented sound stage (after many phone calls, we chose Chapman/Leonard Studios, as they have a 50' x 60' double cyc, and, most critically, a 29' high ceiling). Once hanging there, any lighting adjustments would have to be made remotely as there's no way to get to it with a set built underneath it. The client went with us to scout the facility (ALWAYS scout the facility) and to take some measurements.
![The client on the 50' x 60' x 29' double cyc at Chapman/Leonard Studio [click photo for link].](https://images.squarespace-cdn.com/content/v1/53057e88e4b052d61bf173ef/1422289310173-C58IURBEF5VQD8V5G65N/image-asset.jpeg)
The client on the 50' x 60' x 29' double cyc at Chapman/Leonard Studio [click photo for link].
![Sketches and shopping list (and meeting notes), on the floor of the garage, in a handmade leather Cafe Wallet by Slightly Alabama [click photo for link].](https://images.squarespace-cdn.com/content/v1/53057e88e4b052d61bf173ef/1422287850584-5XE9P0FXJKNFA5ETGGG1/image-asset.jpeg)
Sketches and shopping list (and meeting notes), on the floor of the garage, in a handmade leather Cafe Wallet by Slightly Alabama [click photo for link].
After several trips to Home Depot, 3 separate Amazon.com orders, and twice browsing our local Ace Hardware, we thought we had all the parts we needed to complete the project (spoiler: we didn't.)

Shopping for pipe at Home Depot. Decided to go with the top rail for chain-link fences, which is 1-1/4" galvanized (this is what Dan Gaye of Studio75 used, in the Scott Kelby post).

Our Ford Explorer can hold a 10' 6" pipe with the gate closed. Had to put a moving blanket on the dash to protect the windshield, but it just fit.

Things arranged neatly (sort of). This is most of the parts needed (but not all). Also, not pictured are the twelve 10' pipes and the 400 sq ft white silk panel.
Construction took one person about 8 hours, but there are things that would have been significantly faster with two people. We learned a lot of valuable lessons. We spent some time on YouTube learning how to "swage," and found out that 1/8" aircraft cable is hard to work with and can be very sharp. We will post a detailed, step-by-step process and complete materials and tools list in the near future.

The "little" 10' x 10' frame fully assembled. Aircraft cable cross-braces are tightened after installing using 6" turnbuckles in the center. The big brother of this, the 20' x 20' frame for the silk panel, uses two turnbuckles per cross-brace to take up twice the slack.
The only component we didn't want to try making ourselves was the 20' x 20' artificial silk panel with reinforced edges and grommets for attaching to the frame. It's made by Matthews, sold by B&H, and it seems like a great deal at about $350.
Assembly
Once all the pipes had been cut to the right length, test fit, and the aircraft cable cross-braces all cut and clamped, we loaded everything into the Explorer and headed over to the giant sound stage.
The entire assembly process took two people just two hours (see time-lapse video of the assembly process at the bottom of this post). Considering that it had never been completely assembled (no place big enough to put it all together at our studio), it was surprisingly smooth and easy.

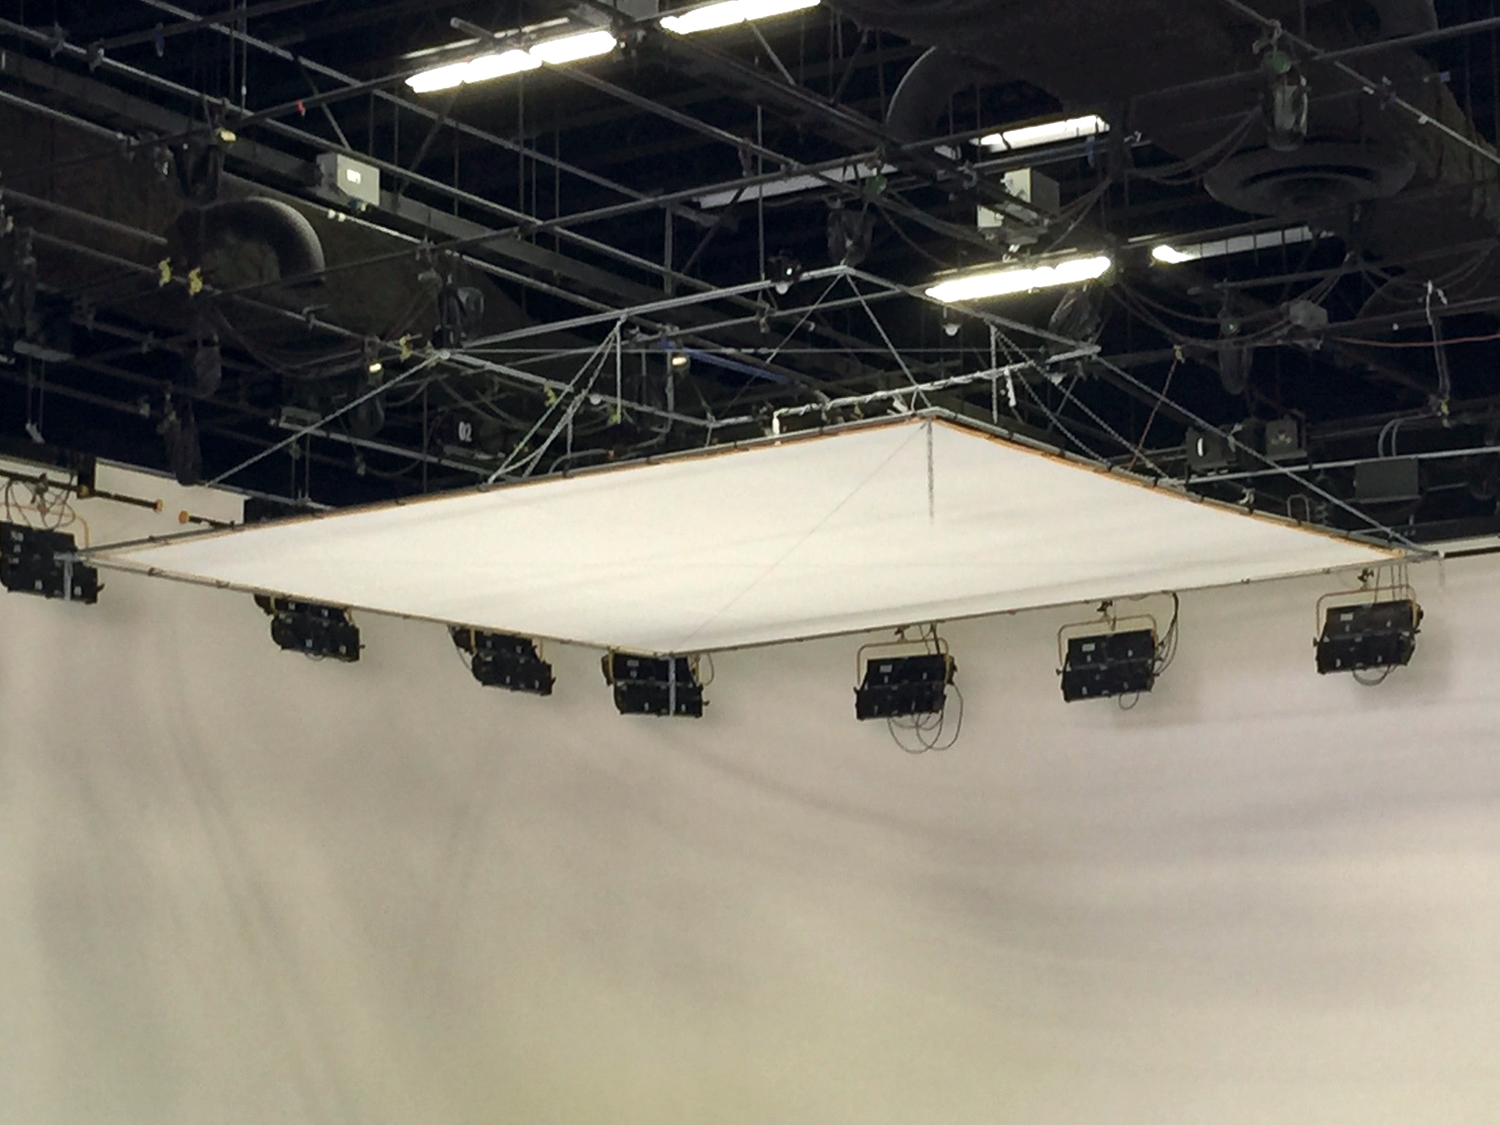
The 10' x 10' lighting rig assembled, cross-braced, and hanging from the chains.

Lighting rig with six Paul Buff Einstein 640ws strobes, in position and tested to power up, adjust and fire remotely via CyberCommander module. Also, 20' x 20' silk frame assembled and cross-braced on the floor, and attached by eight chains. Silk panel and 50 ball-bungees ready to be installed.
We have liftoff! 20' x 20' silk panel installed using 48 ball-bungees. Raising the rig requires four separate chains to be pulled simultaneously.
Finished overhead light bank in place, leveled and all the hoisting chains packed up in the rafters. Height from silk to the floor is 21' 6'.
We tested the six Paul Buff Einstein 640ws strobes before raising it out of reach. They are controlled with PCB's CyberCommander, which gives us individual control over them to power up and adjust remotely. Once the set below is built, there will be no way to reach the strobes, so we needed a robust and reliable system.
Time lapse video of the 2-hour assembly process at the sound stage.
We'd love to hear your thoughts on our solution, and hear any suggestions for improvement.